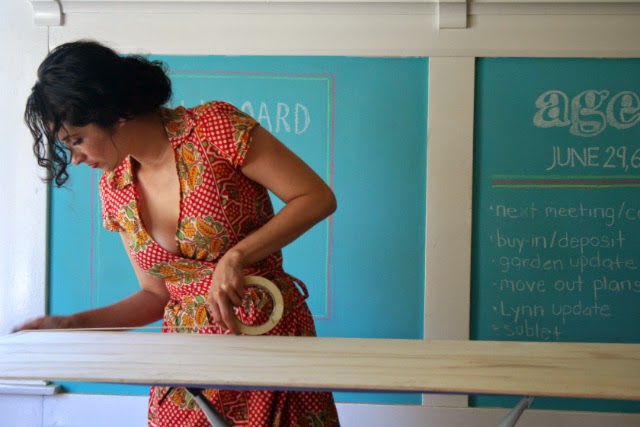
I love sharing the creative pursuits of my talented friends, so I'm delighted this week to feature this chalkboard A-frame sign made by my super-creative housemate, Jessica Parra-Fitch. As a grassroots community organizer, she was shocked when she heard the organization she works for was willing to spend $200 for a plastic sandwich board to support her work. She wanted to gain more visibility in the neighborhood but felt that those funds could be better spent on things like providing healthier food at community events. She told told her colleagues, "I can make that myself for cheaper!" And indeed, she did!
If you already have a screwdriver and chalkboard paint (which you can make very cheaply with our DIY chalkboard paint tutorial, also the brainchild of Jess!), this project will only cost you $20 and some change. That's a 90% savings from a store-bought easel of a similar size!

If you already have a screwdriver and chalkboard paint (which you can make very cheaply with our DIY chalkboard paint tutorial, also the brainchild of Jess!), this project will only cost you $20 and some change. That's a 90% savings from a store-bought easel of a similar size!

I love how thrifty and creative this project is... The plywood panels are held together with door hinges, of all things! So brilliant. I could see it being used in so many different, practical ways: tailgating, wedding signage, yard sales, BBQ menus, low-tech scoreboard for sporting events, family game night (hangman, anyone?), kids' crafting corner... What other great ways would you use an A-frame easel? There are so many fabulous possibilities!
Inspired to make your own yet? Get down to the nuts and bolts (literally!) to make this sign like Jess!

What you'll need:
- 2 pieces of plywood (can be any size, but must be the same size as one another)
- masking or painter's tape
- chalkboard paint (make your own with acrylic paint and tile grout with this tutorial!)
- paintbrush
- 2 door hinges
- 8 nuts and 8 bolts, sized to fit your hinges
- screwdriver
- wrench

Step 1: For each piece of plywood, choose the side with the cleanest edges. On one side of Jess's plywood, there was some text stamped right on the edge of the board, so she flipped the board over and used the other side!
Use your masking or painter's tape to create a straight border around the edge of your plywood. Everything will get coated in paint except this taped-off border, creating a really lovely faux frame around the chalkboard. (This was an idea Jess had moments before she began painting: it adds such a nice touch!)

Step 2: Paint the taped side of the plywood liberally with chalkboard paint, and repeat with the second plywood sheet: Jess used two coats on each plywood sheet. Once the paint is thoroughly dry, you can remove the masking tape border and move onto the next step.

Step 3: Flip both boards (chalkboard side down), and align the top ends, leaving just enough space for the hinge in between. Arrange the hinges such that they are equidistant from the edges of the plywood as well as from one another. You can estimate if you feel comfortable (this is what Jess did, and it turned out great), or if the perfectionist in you rears its punctilious head, then break out the ruler and your high school math skills!
Once you've got your hinges where you want them, use a pencil to mark where your drill hole will go. Jess skipped over the middle hinge hole, marking only the holes on the far sides of each hinge: eight in all.

Step 4: Pre-drill the holes on each board using a properly-sized drill bit. We were fresh out of drill bits, so Jess instead used a nail slightly smaller than the nuts she was using. Make sure the edge of the plywood is hanging off the table you're drilling on: the nail or drill bit will be longer than the width of the plywood, and you don't want to accidentally drill through dining room table!

Step 5: Align the top edges of your plywood again, place the hinges back over the drill holes, and nudge the boards around until the drill holes align with the hinge holes. With half of each board hanging off the edge of your table—again, to avoid accidentally drilling through the table—screw each nut through the hinge and drill hole, all the way through to the other side of the board. It helps to have a second person to hold both pieces of plywood steady (thanks, Alex!).

Step 6: Flip the chalkboard back over, and you'll find some fine-looking nuts poking through your chalkboard sign! Use your wrench to attach a bolt to each nut. Pat yourself on the back for simultaneously securing your chalkboard sign and preventing a drunken injury on those surprisingly sharp nuts at your next tailgating party.

Step 7: It's ready to go! Fertilize your creative genius, grab a pack of white or colored chalk, and draw whatever strikes your fancy. I especially love the the birds and grass in Jess's design!

And that's it! Have you made one of these for yourself? If so, post a picture of it in the comments, and tell us what you use yours for! This sandwich board is a blank slate in more ways than one... The possibilities are endless!


I wish my chalkboard sign art were as good as yours... When I was the manager at Harry & David I had to use a chalkboard easel sign for our Girls Night Outs and Epicurean Evenings.. It was sad (at best)
ReplyDeleteyesss allright sir!
ReplyDelete